

Operating a Sensor Acceleration Test Stand is a crucial process that ensures the accuracy and reliability of sensors used in various industries. As a leading supplier of Sensor Acceleration Test Stands, I'm here to guide you through the operation process step by step.
1. Pre - operation Preparations
Before starting the operation of the Sensor Acceleration Test Stand, thorough preparations are necessary. First, check the physical condition of the test stand. Ensure that all mechanical components are intact, without any visible cracks or damages. The power cables should be properly connected and in good condition to prevent electrical hazards.
Inspect the sensors to be tested. Make sure they are clean and free from any debris that could affect the test results. Calibrate the test stand according to the manufacturer's instructions. This calibration process is vital as it sets the baseline for accurate measurements. Use a certified calibration device to ensure the highest level of precision.
2. Sensor Installation
Once the pre - operation checks are completed, it's time to install the sensor on the test stand. The installation method may vary depending on the type of sensor and the design of the test stand. In general, follow these steps:
- Positioning: Place the sensor in the designated area on the test stand. Ensure that it is centered and properly aligned. Misalignment can lead to inaccurate acceleration readings.
- Securing: Use appropriate fasteners such as screws or clamps to secure the sensor firmly. A loose sensor can move during the test, causing errors in the data.
- Connection: Connect the sensor to the test stand's data acquisition system. Use high - quality cables to minimize signal interference. Check the connection to ensure that there are no loose ends or short circuits.
3. Setting up the Test Parameters
After installing the sensor, you need to set up the test parameters according to the requirements of the sensor and the application.
- Acceleration Range: Determine the appropriate acceleration range for the test. This range should cover the expected acceleration values that the sensor will encounter in its actual use. For example, if the sensor is used in an automotive application, the acceleration range may need to be set to simulate the vehicle's acceleration and deceleration during normal driving and emergency braking.
- Test Duration: Decide on the duration of the test. Longer tests can provide more comprehensive data, but they also consume more time and resources. Consider the purpose of the test and the available time when setting the test duration.
- Test Profile: Select the appropriate test profile. This can be a constant acceleration, a sinusoidal acceleration, or a more complex acceleration pattern. The test profile should mimic the real - world conditions that the sensor will experience.
4. Starting the Test
Once all the parameters are set, you can start the test. Press the start button on the test stand's control panel. The test stand will then begin to apply the specified acceleration to the sensor.
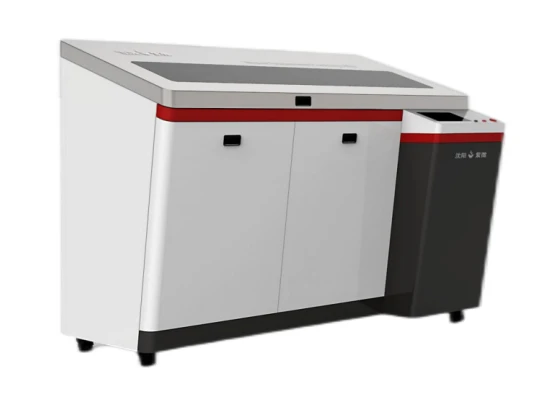

During the test, closely monitor the test stand and the sensor. Check the display for any abnormal readings or error messages. If there are any issues, stop the test immediately and troubleshoot the problem.
5. Data Collection and Analysis
As the test progresses, the data acquisition system will collect data from the sensor. This data includes acceleration values, time stamps, and other relevant information.
- Data Recording: Ensure that the data is recorded accurately. The data can be stored in a local storage device or transferred to a computer for further analysis.
- Analysis: Use appropriate software to analyze the data. Look for patterns, trends, and any deviations from the expected results. Compare the test data with the sensor's specifications to determine if the sensor meets the requirements.
6. Post - test Procedures
After the test is completed, follow these post - test procedures:
- Shutdown: Turn off the test stand following the proper shutdown sequence. This helps to protect the equipment and prevent any potential damage.
- Sensor Removal: Carefully remove the sensor from the test stand. Handle the sensor with care to avoid any physical damage.
- Report Generation: Generate a test report that includes the test results, analysis, and conclusions. The report should be clear and concise, and it can be used to evaluate the sensor's performance and make decisions about its use.
Related Products
In addition to the Sensor Acceleration Test Stand, we also offer other high - quality test equipment, such as the Automotive Clutch Slave Cylinder, Master Cylinder, Booster Cyclic Durability Test Bench, Mobile Air Tightness Tester, and Brake Hose Air Tightness Testing Machine. These products are designed to meet the diverse testing needs of different industries.
Contact for Purchase and Negotiation
If you are interested in our Sensor Acceleration Test Stand or any of our other products, we encourage you to contact us for purchase and negotiation. Our team of experts is ready to provide you with detailed information, answer your questions, and help you find the best testing solutions for your specific requirements.
References
- "Accelerometer Handbook" by Analog Devices Inc.
- "Testing and Calibration of Sensors" by John Wiley & Sons